
Help beginning and intermediate band students solve ten common snare drum problems, from uncomfortable setup and uneven hands to tense…...
Help beginning and intermediate band students solve ten common snare drum problems, from uncomfortable setup and uneven hands to tense soft playing, disconnected flams, and gaps in a concert roll.
By Bill Stevens · The Music Educator Podcast · Season 8, Episode 13 · October 24, 2026 · Audio: 10 minutes, 43 seconds
The rhythms might be correct, but the snare drum still sounds uneven, tense, or too loud. Where should a music teacher start? This episode focuses on concert snare drum: what to watch and listen for, what may be causing the problem, and one focused correction to try. Use these show notes alongside the player above or as a rehearsal reference.
Fit the drum to the student, demonstrate the sound you want, and change one thing at a time. Let the student compare the result before adding another instruction. A short passage makes it easier to hear whether the correction helped.
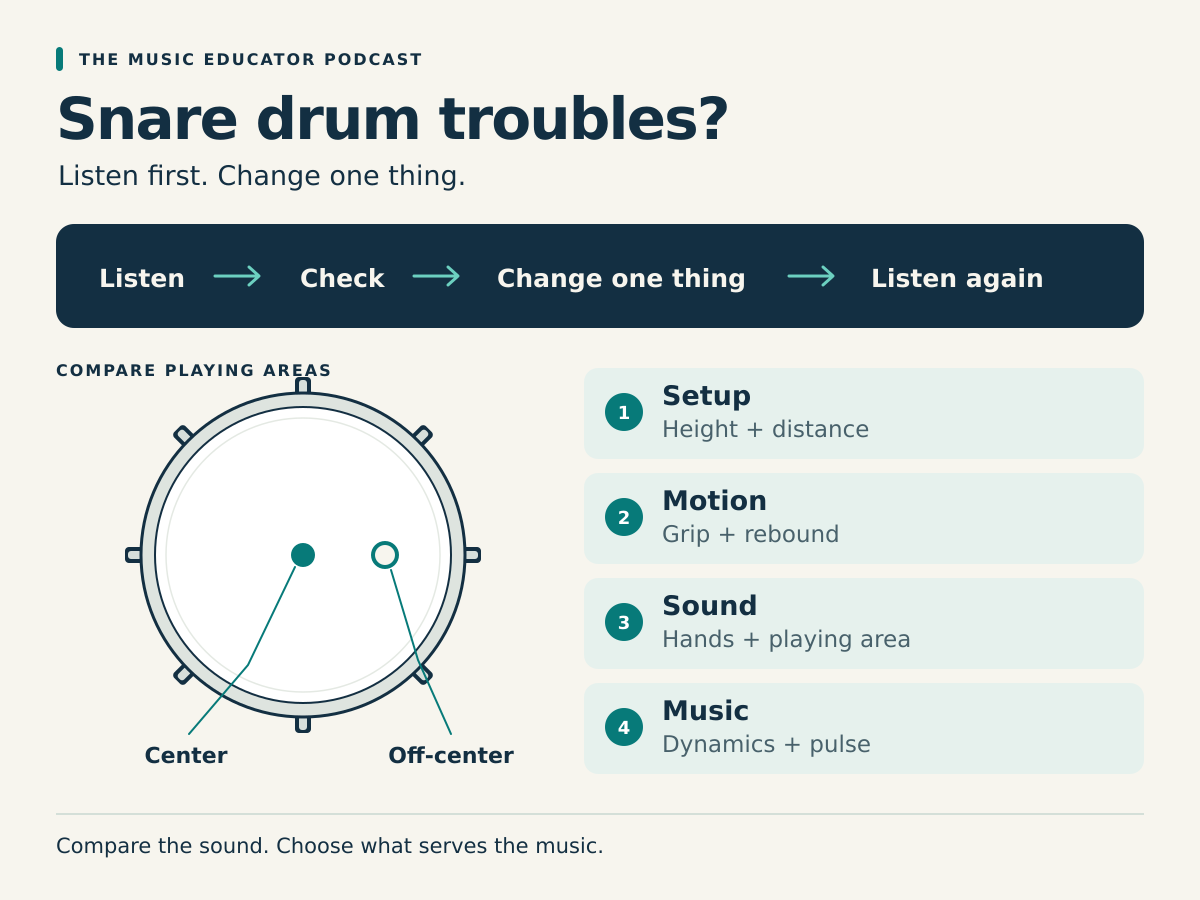
Approximate audio times are included below. Select a topic to jump to its written teaching notes, or use the player to find that point in the episode.
Watch for: Raised shoulders, reaching arms, or a student bending toward the drumhead. A shared stand may still be set for the previous player.
Try this: Have the student step away, relax the shoulders, and let the arms hang. Bring the forearms into a comfortable playing position, then adjust the drum height and distance to meet that position. Make the stand check part of every player change before evaluating technique.
Watch for: White knuckles, rigid thumbs, or fingers that clamp down as the music gets harder. Compare both hands rather than assuming they work alike.
Try this: For a beginning matched-grip setup, establish a secure thumb-and-index-finger pivot with the other fingers resting naturally around the stick. Have the student play a controlled stroke, reduce unnecessary squeezing slightly, and compare the response. Keep enough contact to guide the stick without preventing it from moving.
Watch and listen for: A pinched sound and a stick that remains down after an ordinary rebound stroke.
Try this: Demonstrate the whole motion: down, contact, and return. Practice one hand at a time with space between strokes, watching where the stick finishes. The image of bouncing a ball can help students understand that the return belongs to the motion. This check is for basic rebound strokes; other stroke types can have different finishing positions.
Listen for: An unintended strong-weak pattern in music that has no accents. Compare starting heights, motion, and landing places.
Try this: Play four comfortable right-hand strokes, four left-hand strokes, then eight alternating strokes. Match the sound before increasing speed. A short recording can help students hear whether one hand stands out. In accented music, intentional differences should follow the notation.
Watch and listen for: One stick landing near the middle while the other wanders toward the rim, producing an unplanned change in tone.
Try this: Begin with a consistent area near the center, keeping the tips close enough for a similar sound without colliding. Then deliberately compare it with a spot nearer the edge. Ask students to describe the difference. The goal is intentional, repeatable placement, not one location for every musical situation.
Watch for: Fingers squeezing and arms stiffening when you ask for a quieter sound.
Try this: Play one easy rhythm at three contrasting dynamics without changing tempo. Listen for a clear sound at each level, then add a gradual crescendo and diminuendo. Stick height and stick speed both affect volume; height alone does not explain the result. A soft note still needs a deliberate, controlled stroke.
Listen for: Steady quarter notes followed by rushing when eighth notes arrive.
Try this: With a slow metronome, alternate one measure of quarter notes and one of eighth notes while keeping the beat unchanged. Speak the counts and clap before adding sticks if needed. Apply the same process to a short passage in the student's music so the pulse remains audible underneath the changing subdivision.
Listen for: Two disconnected events when the grace note is too early, or a single flat hit when both sticks arrive together.
Try this: Prepare the grace-note stick close to the head and the primary-note stick higher. Play one flam, stop, and reset. Keep the primary note on the beat, with the grace note just before it. Work with each hand leading before alternating. Listen for a connected sound and a clear main note before adding speed.
First identify the goal: A concert multiple-bounce roll and an open double-stroke roll are different sounds. Demonstrate the one the music requires.
Try this: For a concert roll, develop individual buzzes with similar length and quality in each hand. Connect a right-hand buzz to a left-hand buzz, reverse the order, and build short groups before longer rolls. Check excess pressure if the sound is crushed. Compare buzz lengths and transitions if there are gaps. Moving faster can mask the issue rather than solve it.
Check: Whether the snares are engaged, the condition of the heads and snare assembly, and the instrument's response when you play it. Tuning, snare tension, and muffling all affect the result.
Try this: Ask someone familiar with concert snare preparation to check the instrument when needed. Avoid large, random adjustments. Let the student compare the sound before and after a correction. Practice pads are useful, but students also need time on the actual drum to learn its response and resonance.
At approximately 9:35, the episode brings the checks back to a simple teaching routine:
The teaching takeaway: start with a comfortable setup and a clear sound goal, then teach one correction at a time.
If the difficulty starts with reading rather than stick technique, use one of these free Music Educator worksheets before returning to the instrument. Choose the activity that matches the problem; students do not need to complete both.
Rhythm Detective: Repair the Measure asks students to complete measures in 3/4 and 4/4 with a missing note or rest. Choose one measure, have the student explain its beat total, then count and clap the completed rhythm. Keep the pulse going silently through rests. Transfer the same rhythm to a pad or snare drum at a comfortable tempo.
Listen for: Does the pulse stay steady when the student moves from counting to playing? If the written answer is correct but the playing rushes, return to the pulse check above rather than assigning more written work.
Dynamics Detective: Follow the Volume checks starting and ending dynamics and gradual changes. After one example, have the student play a short, familiar rhythm with that change while maintaining tempo. Use comfortable, contrasting sounds; dynamic markings are relative, not fixed volume measurements.
Listen and watch for: Is the change audible without squeezing the grip? If the student understands the markings but becomes tense, use the soft-playing check above.
Each resource page offers a student-only PDF and a complete packet with the teacher key. Choose the student-only file for an independent check. Finish by asking, “What changed in your sound, and what will you listen for in the next rehearsal?”
For additional teaching detail, explore these specialist articles from Yamaha:
Share this episode with a fellow music educator who could use practical percussion teaching ideas.